My name is Jacob Hechter, I am a rising Junior at Northwestern University working on a degree in Materials Science and Engineering. This summer I’ve been working with Argonne’s Materials for Harsh Conditions group under Dr. Aaron Greco and Dr. Benjamin Gould on their Metal Additive Manufacturing (MAM) project. Colloquially known as metal 3D printing, MAM is the process of continuously adding material to a part during manufacture until the part has the desired final shape. This is in contrast to more traditional methods of manufacture, such as milling or grinding, which can be referred to as subtractive manufacturing.
This project focused on a type of MAM often referred to as Selective Laser Melting (SLM) Powder Bed Fusion (PBF). This process uses a Computer-Aided Design (CAD) document as a source for the design, where the CAD document is sectioned into a series of layers. The MAM machine deposits a layer of powder on top of a substrate and scans a laser across this layer of powder, to fuse the powder in the shape described by the bottommost layer of the CAD drawing. This process is repeated, up until the last layer in the CAD drawing has been completed. After this process has been completed, you are left with a part that has literally been built from the ground up.
MAM has several advantages over more traditional methods of manufacture. It allows for the construction of parts with much greater complexity than traditional manufacturing methods, allowing for the formation of internal voids and other such characteristics without the requirement to make multiple pieces which must be welded together. It can make complex parts with significantly less wasted material compared to traditional methods of manufacture. It also requires significantly less infrastructure to perform the manufacturing process, since it does not require an entire assembly line which must be retooled every time a adjustment is made to a design or a new part needs to be made. However, MAM has some other quite significant disadvantages when compared to traditional methods of manufacturing. During the MAM process, the material of the part undergoes complex thermal cycling, where it is rapidly heated and cooled by repeated scans within the space of seconds. This results in unexpected microstructures, and the formations of several characteristic defects which can ruin a part. This requires constant individual validation of every single part made via MAM if said part is going to be used in almost any application, making MAM produced parts significantly more expensive.
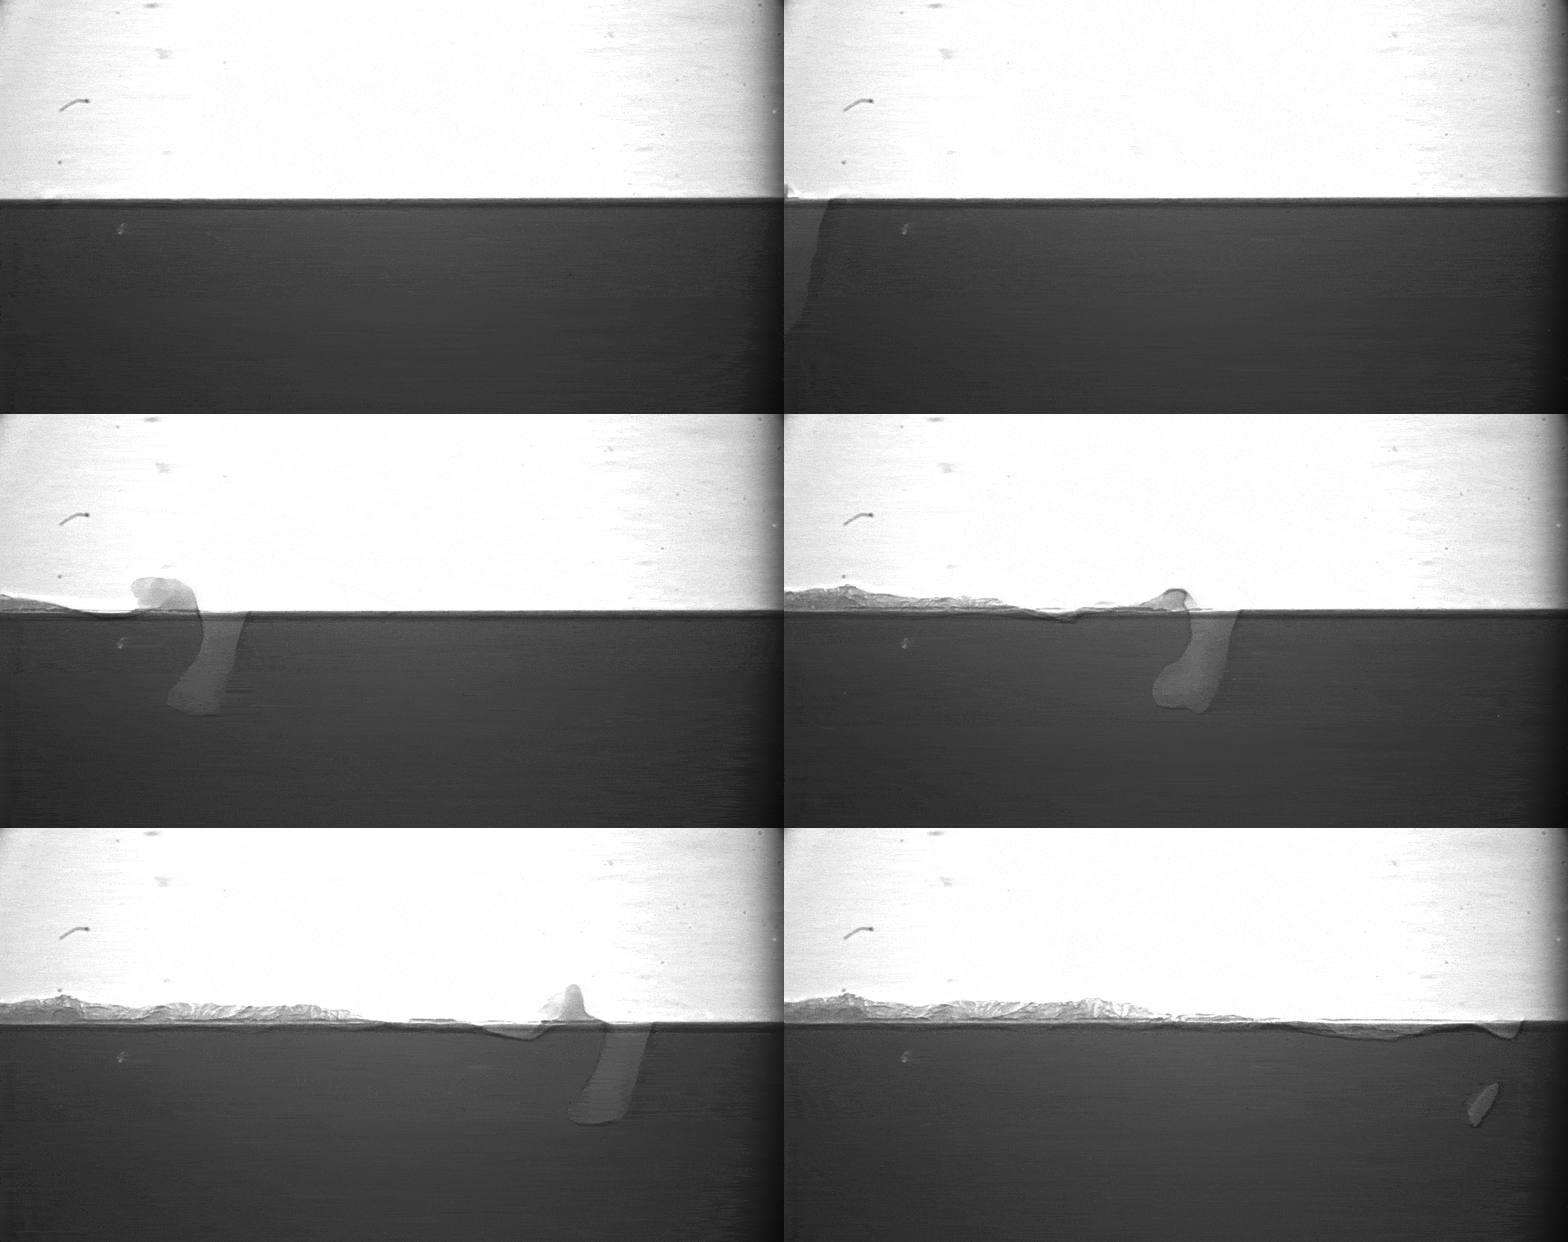
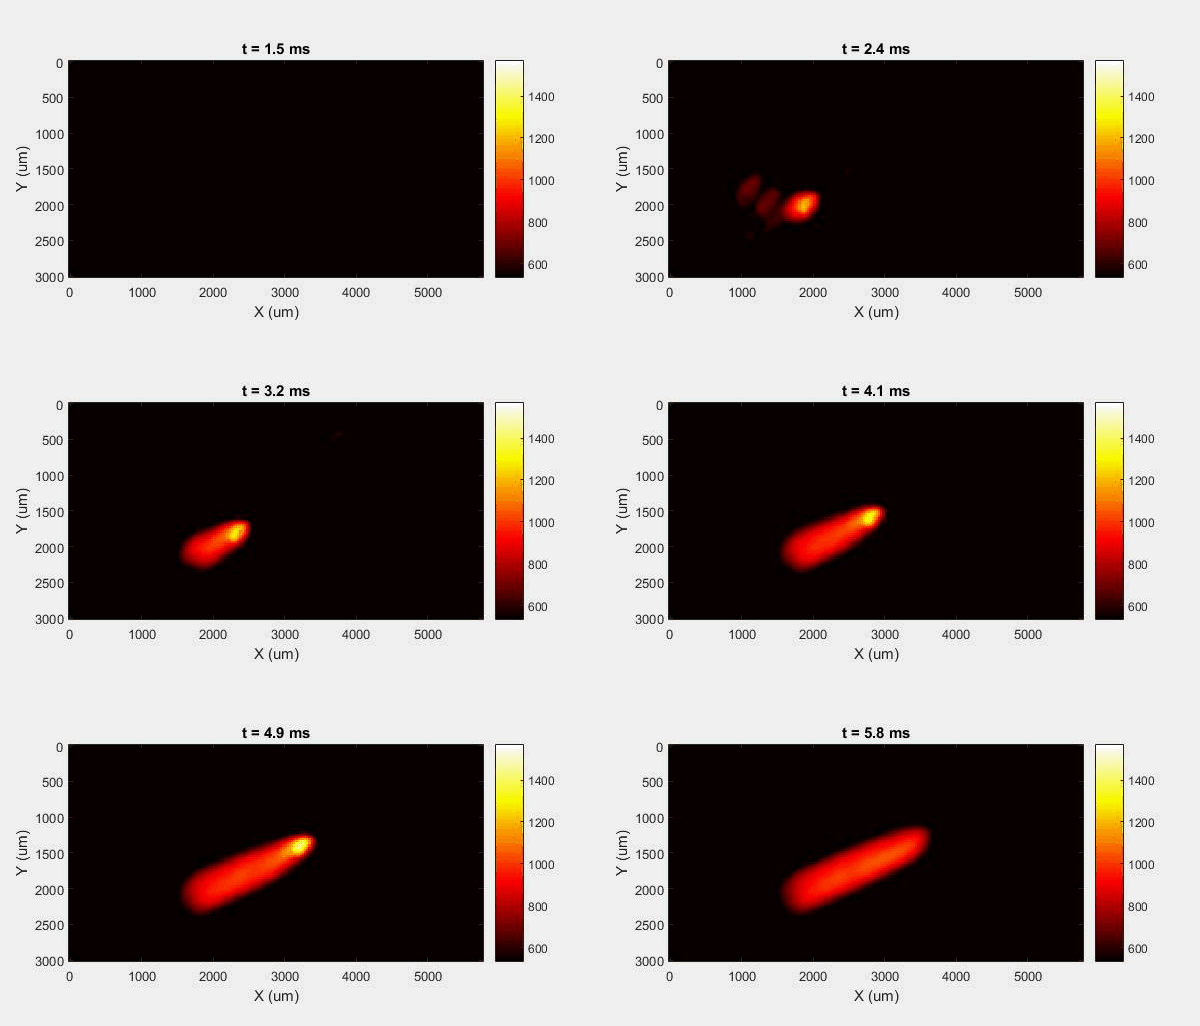
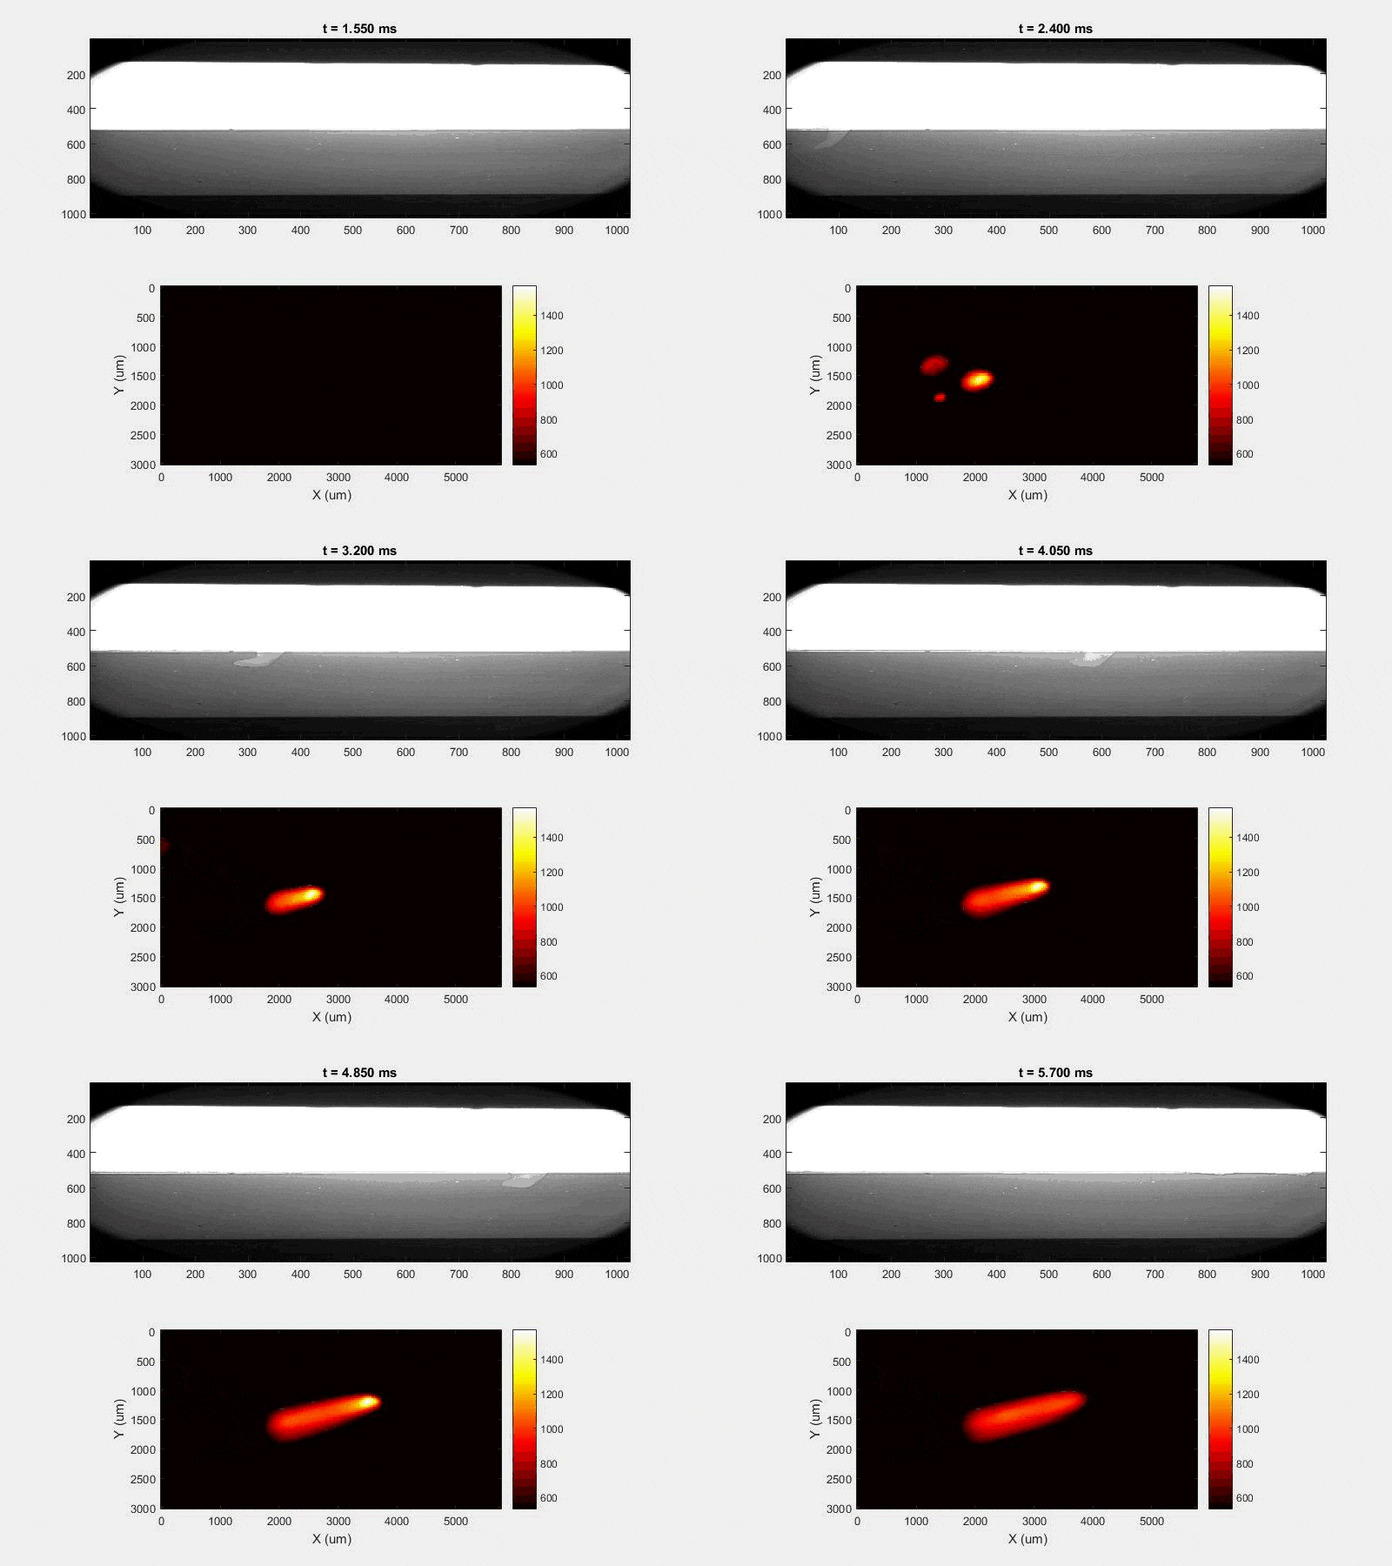
The overall focus of this project is to record in-situ X-ray transmission and IR videos of the MAM process, in an attempt to better understand its behavior and provide tools which can be used to avoid defect formation. The X-ray transmission analysis results in very high spatial and temporal resolution videos, allowing us to record data at hundreds of thousands of frames per second and pixels which are less than 2 microns wide. These videos give a fairly good picture of what is happening physically to the sample during the MAM process, and an example of one of these videos is shown in Figure 1. However, the only reason why we have these sorts of X-ray videos are because of our use of the Advanced Proton Source, and these videos can only really be obtained with relatively thin samples, so it is highly impractical to suggest these X-ray videos as a source of diagnostic of feedback for MAM. On the other hand, pretty much every industrial machine has some sort of IR camera attached to it. If behaviors and defects seen in X-ray can be linked patterns in IR videos (example in Figure 2) then it may be possible to use the IR cameras as a diagnostic tool, giving MAM machines feedback during the process to avoid defect formation and reducing the need for exhaustive validation.
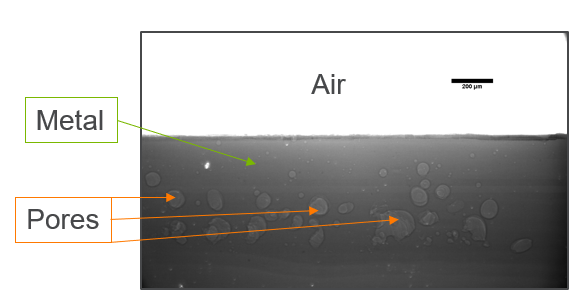
My research has focused on a specific type of defect called Keyhole porosity. This occurs when bubbles of gas get trapped underneath the surface a part constructed during the MAM process, resulting in the formation of relatively spherical pores under the surface of the part. This is opposed to other types of porosity, which can form from incomplete melting of the powder material or improper adhesion of two layers of material. An example of keyhole porosity after a print is shown in Figure 3. To compare the severity of keyhole porosity formation, I treated the area under the surface of the sample with imageJ, and measured the area faction which displayed keyhole porosity. Two examples of this process are shown in figures 4 and 5.


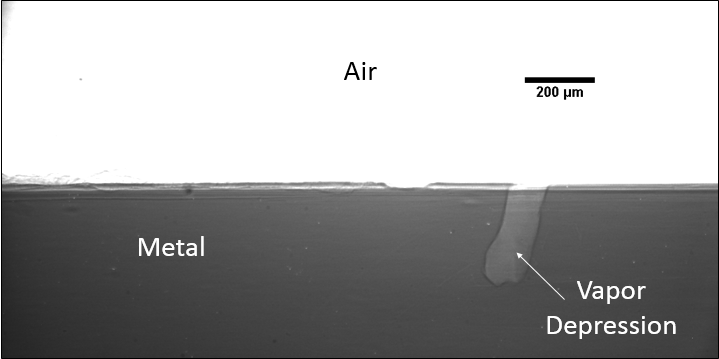
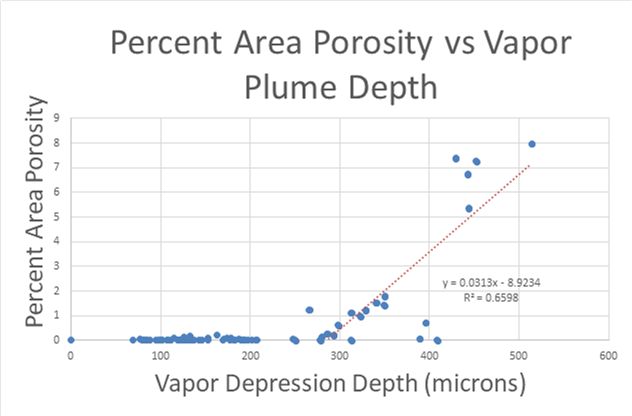
A large majority of my time on this project was spent demonstrating that some behaviors observed by others studying this issue were repeatable. In other studies, it was found that the primary physical characteristic which can be correlated with the formation of keyhole porosity is the geometry of the vapor depression. A vapor depression is a column of vapor that penetrates into the bulk of the part during the MAM process. An example is shown in Figure 6. When the width of the vapor depression is kept constant, the vapor depression depth becomes the primary driving factor for keyhole formation. The physical behavior occurring here is that the surrounding liquid metal will close around the bottom section of the vapor depression. This creates a bubble of vapor underneath the surface, which is often trapped underneath the surface when the surrounding material solidifies. In the case of Ti-6Al-4V, the relation is described in Figure 7. Below about 250 micrometers, there is little to no porosity formation. Above 250-300 microns, serious porosity formation starts to occur, increasing fairly strongly with the vapor depression depth, up until it reaches 5-8 % porosity in the 450-550 micron range.
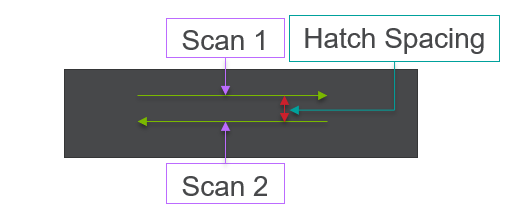
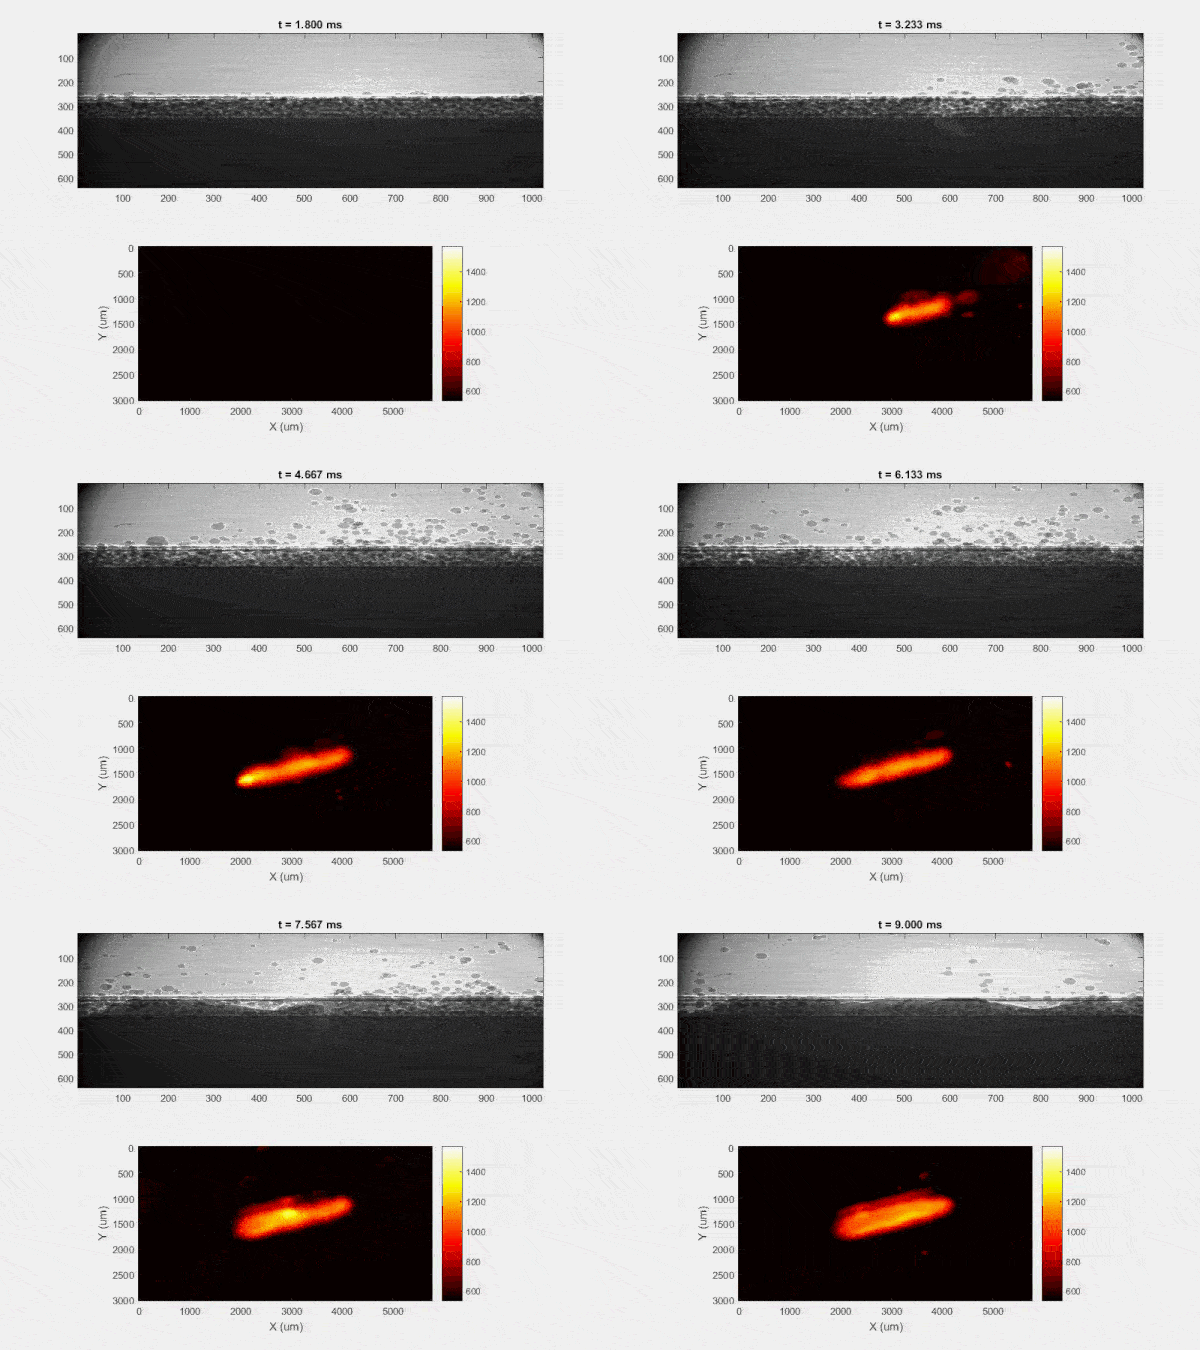
All of this previous data was obtained with single scan samples, in which a sample was scanned once with the laser used to simulate the MAM process. However, we also performed multiple tests in which the samples were scanned multiple times, with a slight offset distance between each scan line referred to as the hatch spacing. This work was done in order to study the effect of thermal history on the formation of porosity. An example of the process of scanning on direction, moving to be offset slightly, and then scanning back the other direction is pictures in Figures 9, and Figure 10 is a video showing this behavior in action using X-ray transmission on the top and IR on the bottom. This ends up being a better approximation of the actual MAM process. Constructing a part with MAM requires hundreds, if not thousands of scans, and it seemed pertinent to see how these behaviors changed from scan to scan. The results of this testing show a clear difference between the first and second scan, where the second scan displays a deeper vapor depression, and consequently displays an increased amount of keyhole formation. The data is shown in Figure 11.
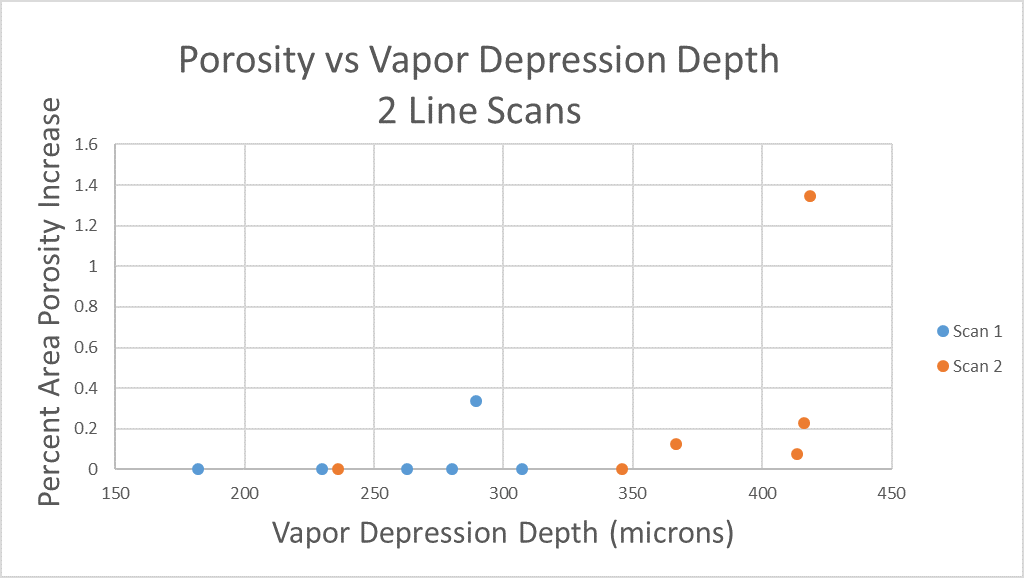
As can be seen, only 1 of the 6 samples display an increase in porosity after the first scan, but 4 of the 6 samples shown an increase in porosity after the second scan (Figure 11). Also, all but one of the scan 2’s have a greater vapor depression depth than the first scan, indicating that this increase in porosity formation is due to an increase in vapor depression depth (Figure 11). There is a statistical significant increase in the vapor depression depth, with the mean being a 107.6 micrometer increase in vapor plume depth, with a standard deviation of 16.4 micrometers, resulting in a 95% confidence interval of 74.9 microns to 140.3 microns.
Unfortunately, I have not been able to transform this information into anything useful for the purpose of detecting keyhole formation with IR. I have made several attempts at potential low hanging fruits, comparing profiles of temperature along the scan line as well as the spot size as seen in the IR camera to the vapor depression width and depth, but have achieved nothing of note at this point. There are still other methods which could be fairly simple to make an analysis out of, as well as much more sophisticated methods which could be used to attempt to find such a correlation. This will be one of the aims of future work.